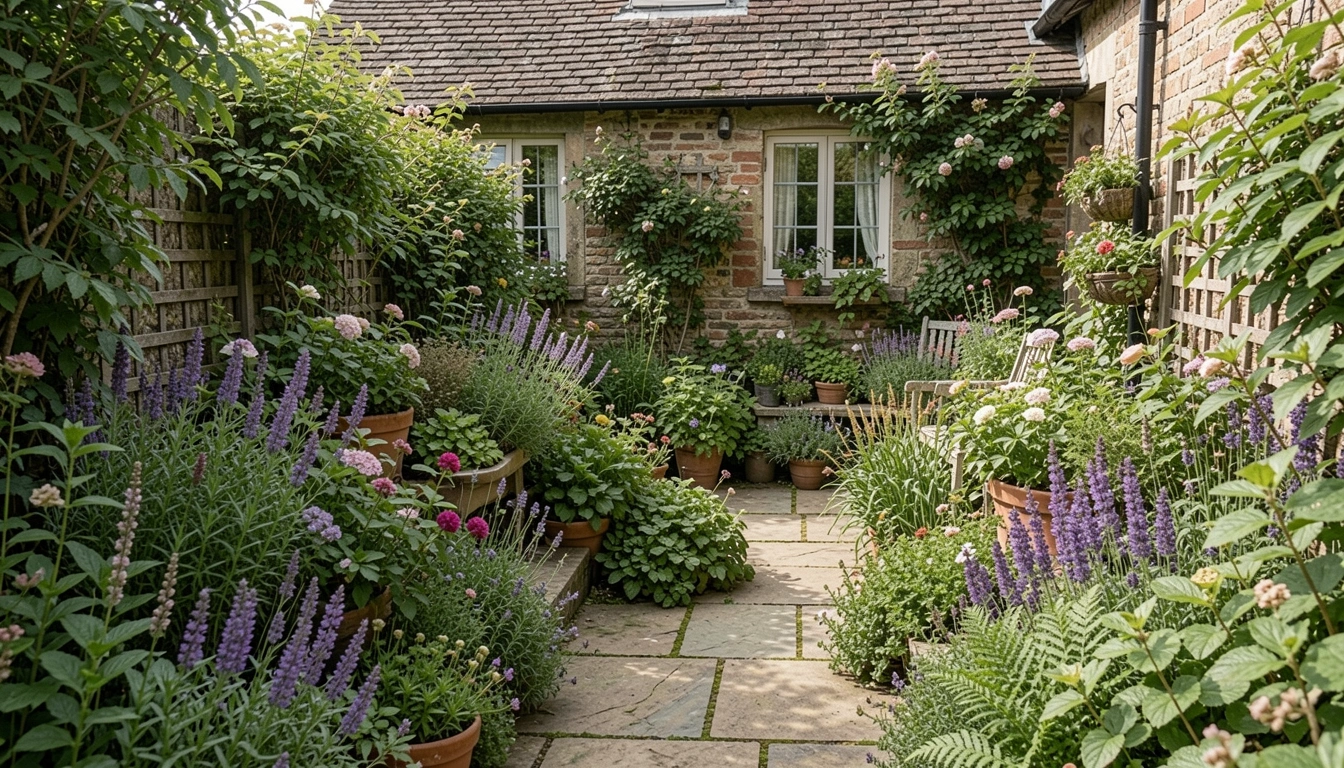
I stared at my cottage garden last spring. It had flowers spilling over, but it felt jumbled. No clear path, corners empty, everything competing for attention.
I wanted that warm, lived-in feel without hours of work. Pots tipped over. Paths got lost in weeds.
One quiet afternoon, I stepped back and saw what was missing: simple balance.
How to Decorate Cottage Garden Easily
This method settles a cottage garden into a comfortable flow. You'll end up with layered plants and touches that feel right at home. It's straightforward, from my own yard.
What You’ll Need
- Rustic wooden birdhouse, 10-inch
- Vintage-style metal lantern, medium black
- Woven willow basket planters, set of 3
- Weathered stone stepping stones, 12-inch round
- Soft cotton garden bench cushions, 18×18 inch neutral
- Solar-powered fairy string lights, 33 feet warm white
- Tall galvanized metal watering can, 2-gallon
- Vintage wooden garden bench, 4-foot
Step 1: Clear and Map Your Paths
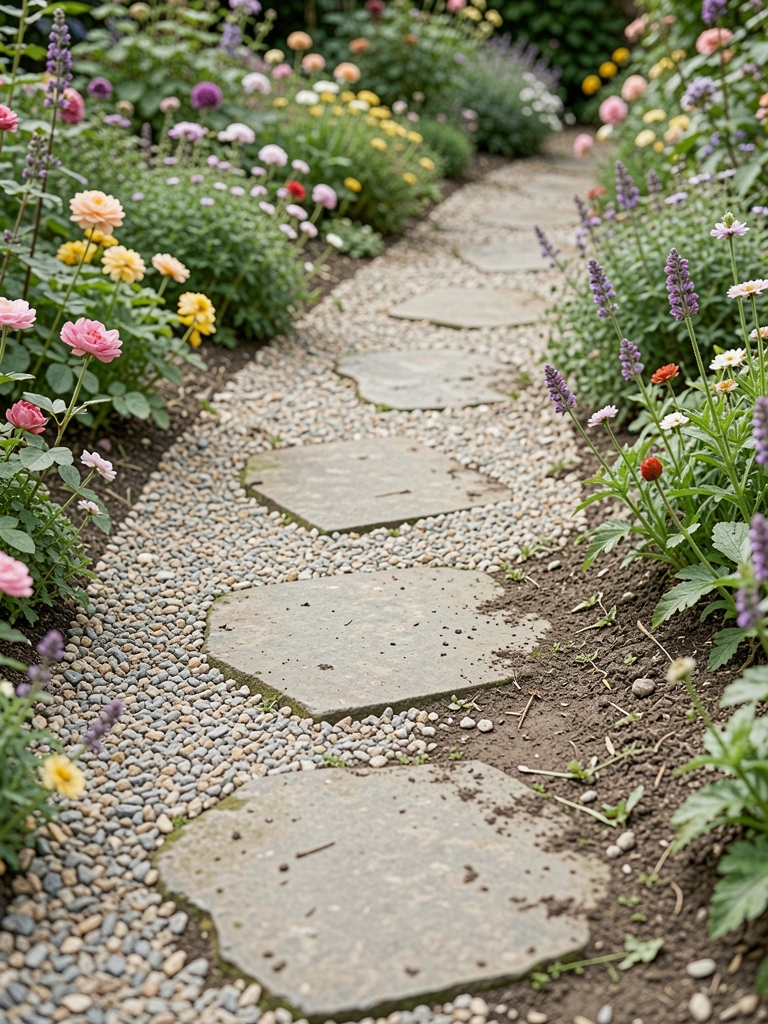
I walk the garden first, pulling weeds that block natural lines. This opens up the ground, letting you see where feet naturally go.
Visually, paths emerge—clean lines through the green. It changes everything from crowded to breathable.
People miss how paths pull your eye through the space. Without them, plants fight each other. Avoid cramming stones too tight; leave room for grass to peek through.
I place weathered stone stepping stones, 12-inch round where I step most. It feels steady underfoot now.
Step 2: Layer Heights in Corners

Corners catch my eye next. I tuck tall foxgloves or hollyhocks in back, then mid-height herbs forward.
The corner fills with depth—high greens framing lower blooms. It draws you in without overwhelming.
Most overlook empty corners; they make the whole garden feel bare. Don't plant everything at eye level; heights create that cozy hug.
I add woven willow basket planters, set of 3 at knee height. Balance pulls the eye up gently.
Step 3: Place Focal Points Low
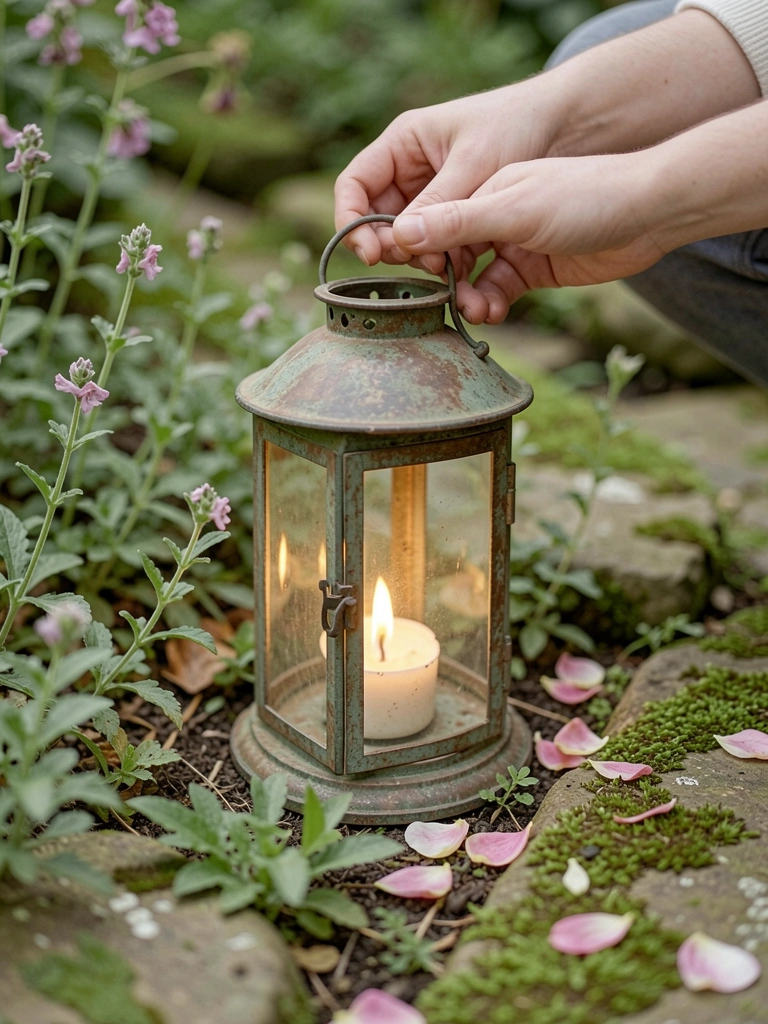
I pick one spot per path end for a low anchor. A lantern or bench settles the energy.
Now, your eye rests there—warm metal against soft petals. The garden breathes easier.
Folks forget low points ground the chaos. Skip floating decor high up; it unbalances. I set the vintage-style metal lantern, medium black where paths meet. Comfortable pause.
Step 4: Hang and Soften Edges
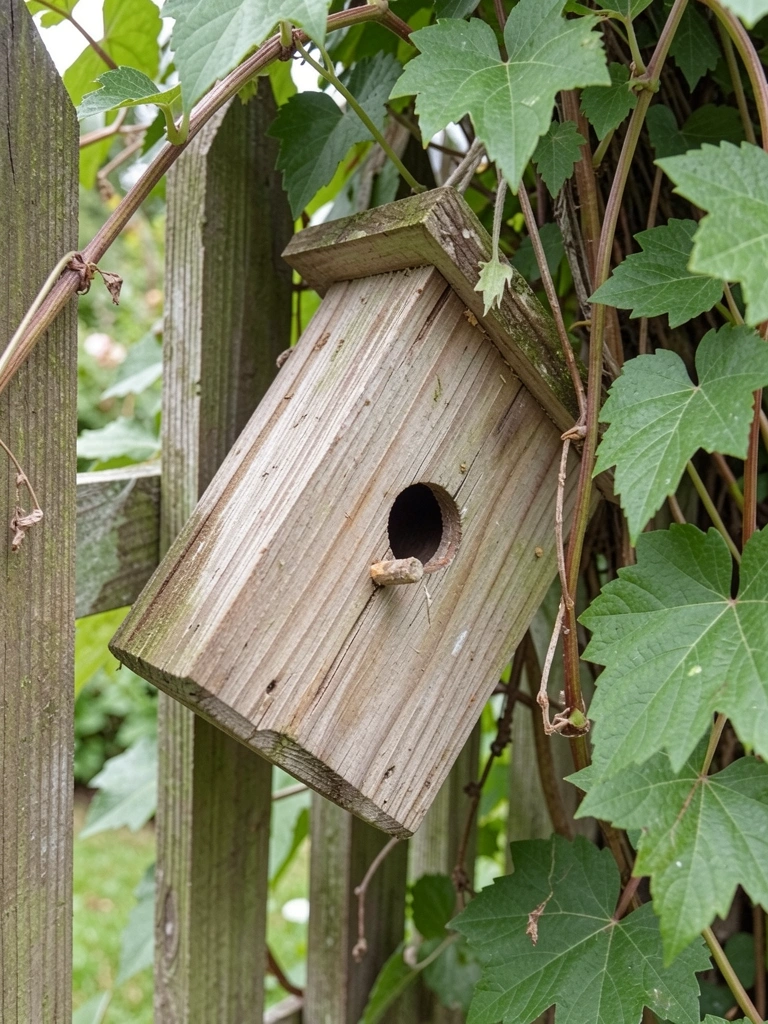
Edges need softening. I hang a birdhouse on a fence or shepherd's hook.
Edges warm up—vertical lines blurred by the perch. It connects ground to sky.
The insight: edges frame without sharpness. Avoid straight hangs; let them lean into plants. My rustic wooden birdhouse, 10-inch sways lightly now.
Step 5: Add Rest Spots
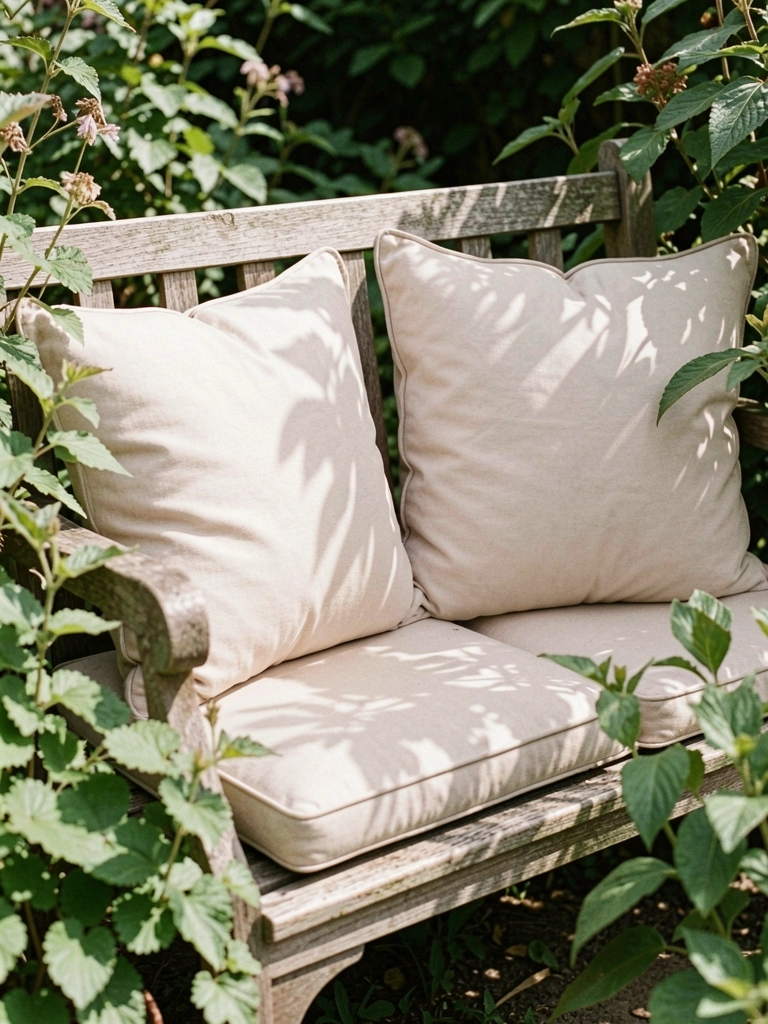
Finally, I drop in a bench with cushions. It invites lingering amid the layers.
The space feels complete—somewhere to sit pulls it together. Visual flow settles.
People miss how seating balances abundance. Don't shove it in a corner; align with paths. My vintage wooden garden bench, 4-foot with soft cotton garden bench cushions fits just right.
Step 6: Light It Gently
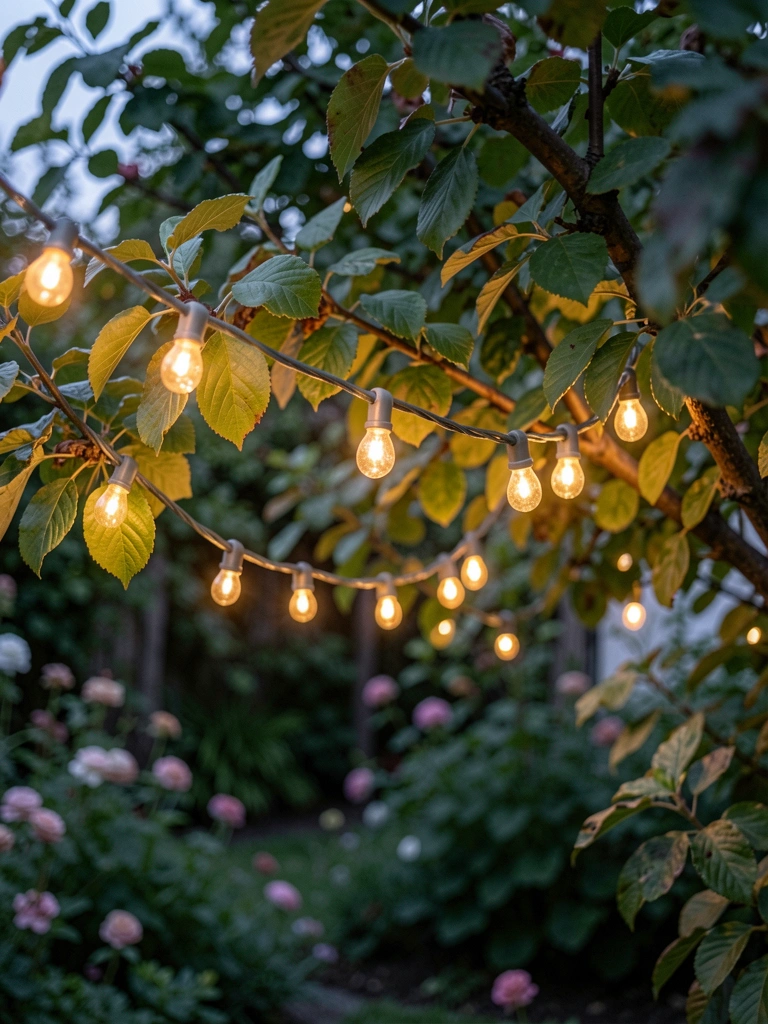
Evening comes, so I drape lights loosely over arches.
Paths glow softly—warmth without glare. It extends the day's comfort.
Overlooked: lights follow structure, not random. Avoid tight bunches; space for air. Solar-powered fairy string lights, 33 feet warm white blend in.
Layering Plants for Depth
I layer like this in my cottage beds. Tall at back, tumbling mids, ground covers front.
It builds that full, lived-in look. No bare soil shows.
- Start with perennials like delphiniums for height.
- Fill mids with lavender or salvia.
- Edge with creeping thyme.
Depth makes small spaces feel bigger.
Personal Touches That Last
I keep touches simple. A tall galvanized metal watering can, 2-gallon by the bench holds tools.
They age with the garden. Patina matches plants.
- Pick metal or wood over plastic.
- Place where you use them daily.
- Let weather work its charm.
Feels like home.
Year-Round Balance Tips
Cottage gardens shift seasons. I prune lightly, add mulch.
Balance stays with evergreens in winter.
- Mulch paths to suppress weeds.
- Swap annuals for bulbs.
- Check seating stays dry.
It holds through rain or frost.
Final Thoughts
Start with one path or corner. My garden came together that way.
You'll see the shift—balanced, inviting.
Trust your steps through it. That's the real comfort.
Leave a Reply