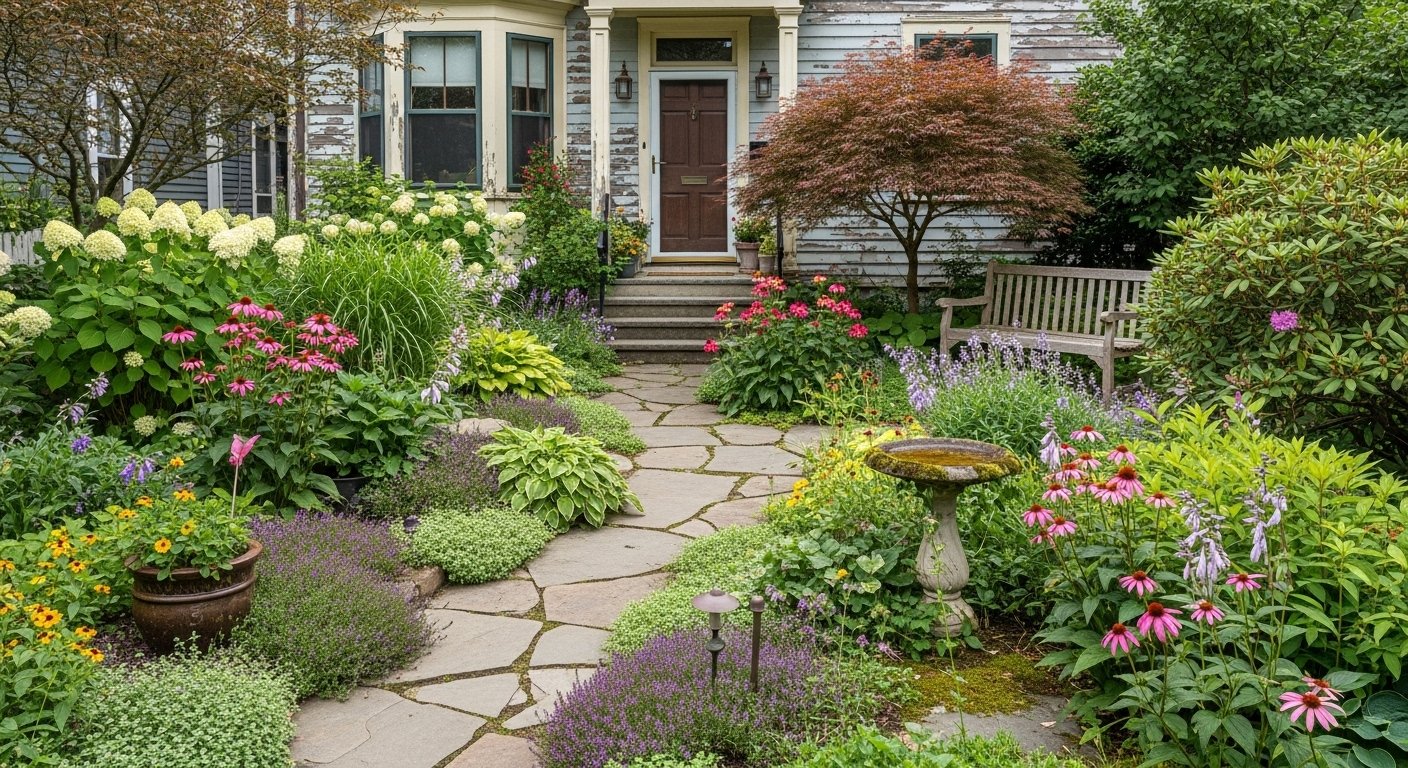
I stood in my front yard last spring, staring at the empty patches by the walkway. It felt flat, like it didn't welcome anyone home. I'd planted grass, but it just sat there, doing nothing.
Neighbors' yards had that pull—you wanted to linger. Mine? You hurried past.
I wanted simple warmth, nothing fussy. Turns out, it's about a few right placements.
How to Decor Front Yard Garden
This shows you how I make a front yard feel balanced and lived-in. You'll end up with a space that draws the eye gently, without constant work.
What You’ll Need
- 20-inch terracotta planters
- Assorted hosta perennials
- Black gravel mulch bag
- Solar pathway lights set of 8
- Tall metal garden obelisk
- Lavender potted plants trio
- Curved edging stones pack
Step 1: Clear and Frame the Edges
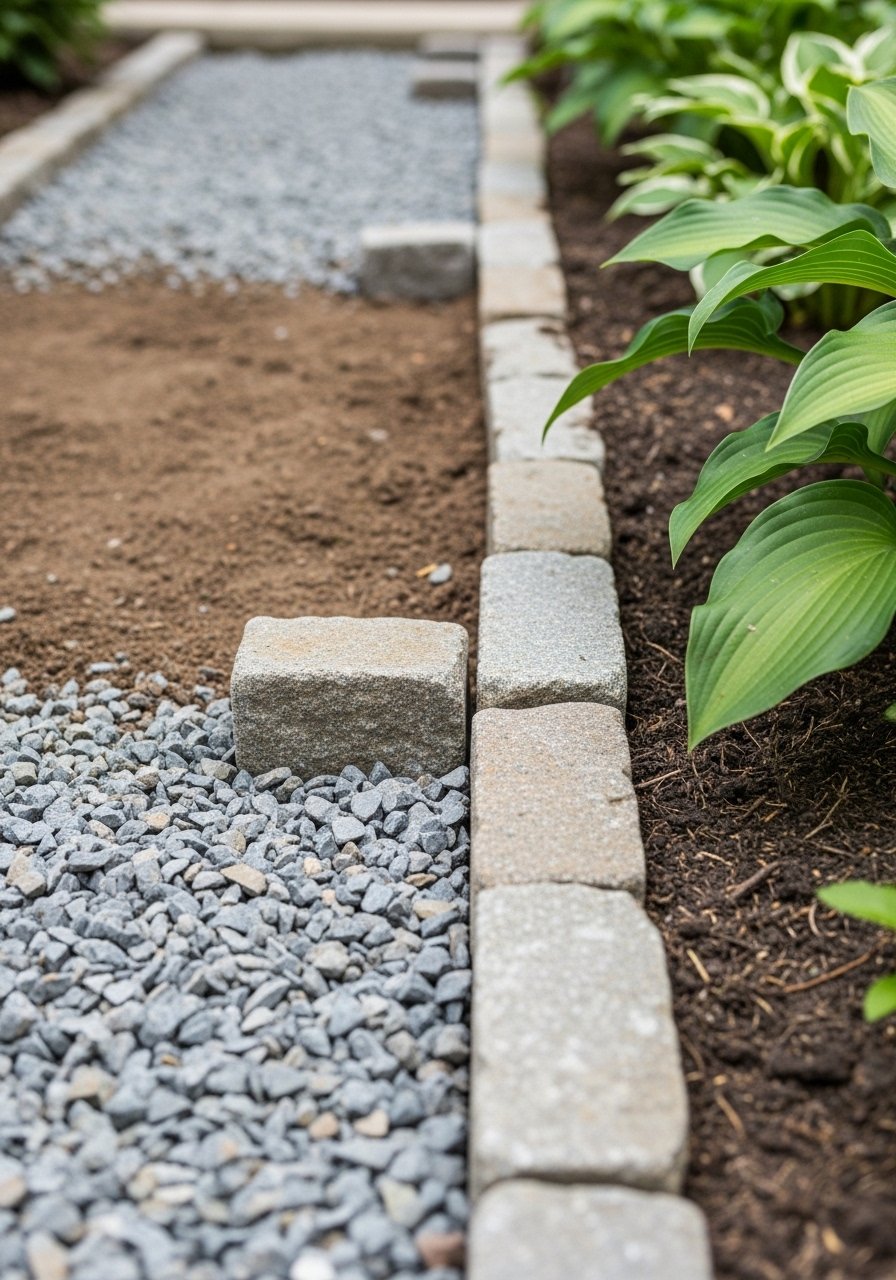
I walk the yard first, pulling weeds and stray grass. It opens everything up. Then I set curved edging stones along the walkway. They draw a quiet line, making the space feel contained.
Visually, the yard shifts from messy to held-together. Edges give it bones—without them, plants spill and look lost.
People miss how edges make scale right; they fight the whole yard instead. Avoid burying stones too deep—they lose shape.
I step back. Now it breathes.
Step 2: Place Your Tallest Points First
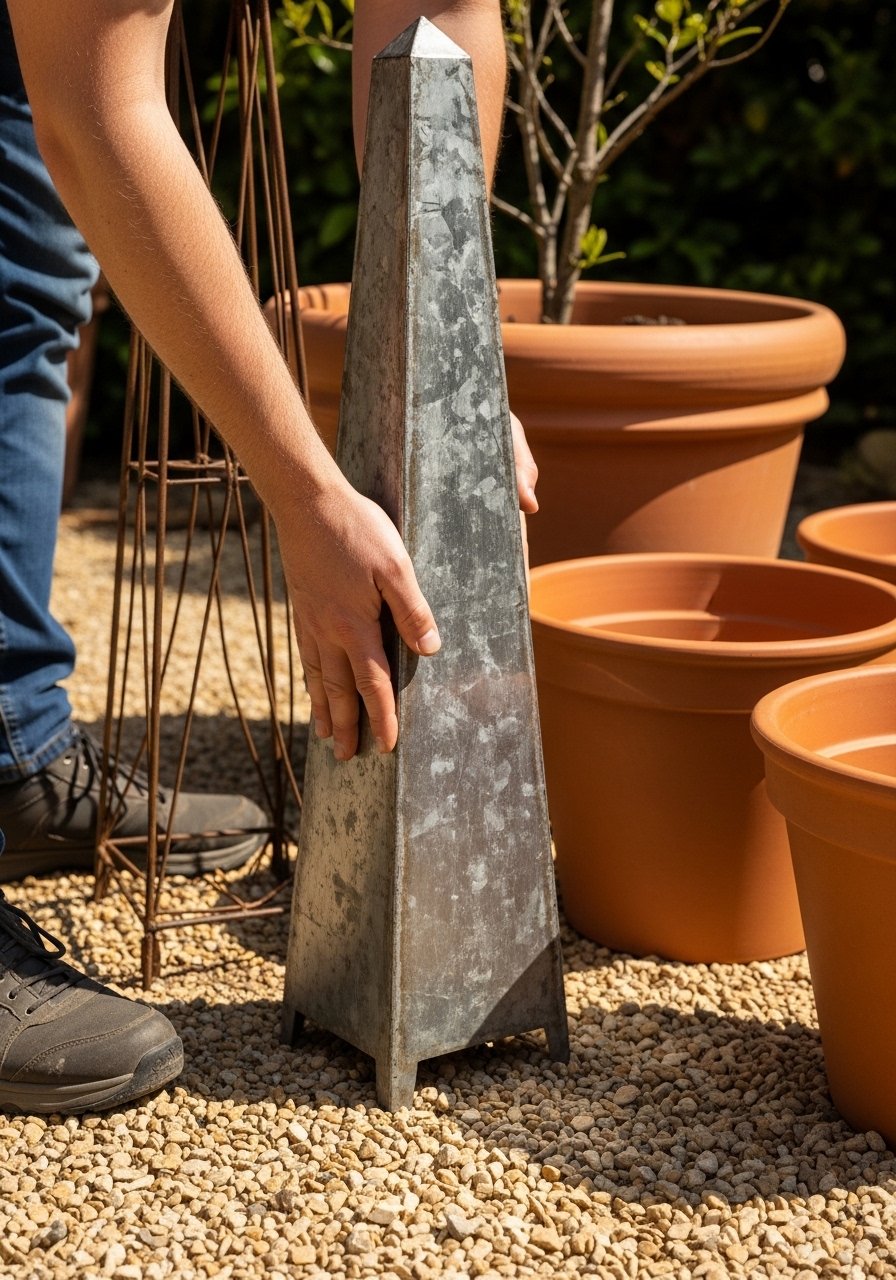
I pick the tallest piece—a metal obelisk—and sink it where the eye hits first, like by the door or path bend. It anchors without shouting.
The yard gains height now. Flat spots lift; balance starts.
Most skip this—they cram low plants everywhere. Insight: one tall thing pulls the rest together. Mistake: centering it dead-on; offset feels natural.
I eye it from the street. It settles in.
Step 3: Layer Pots for Depth
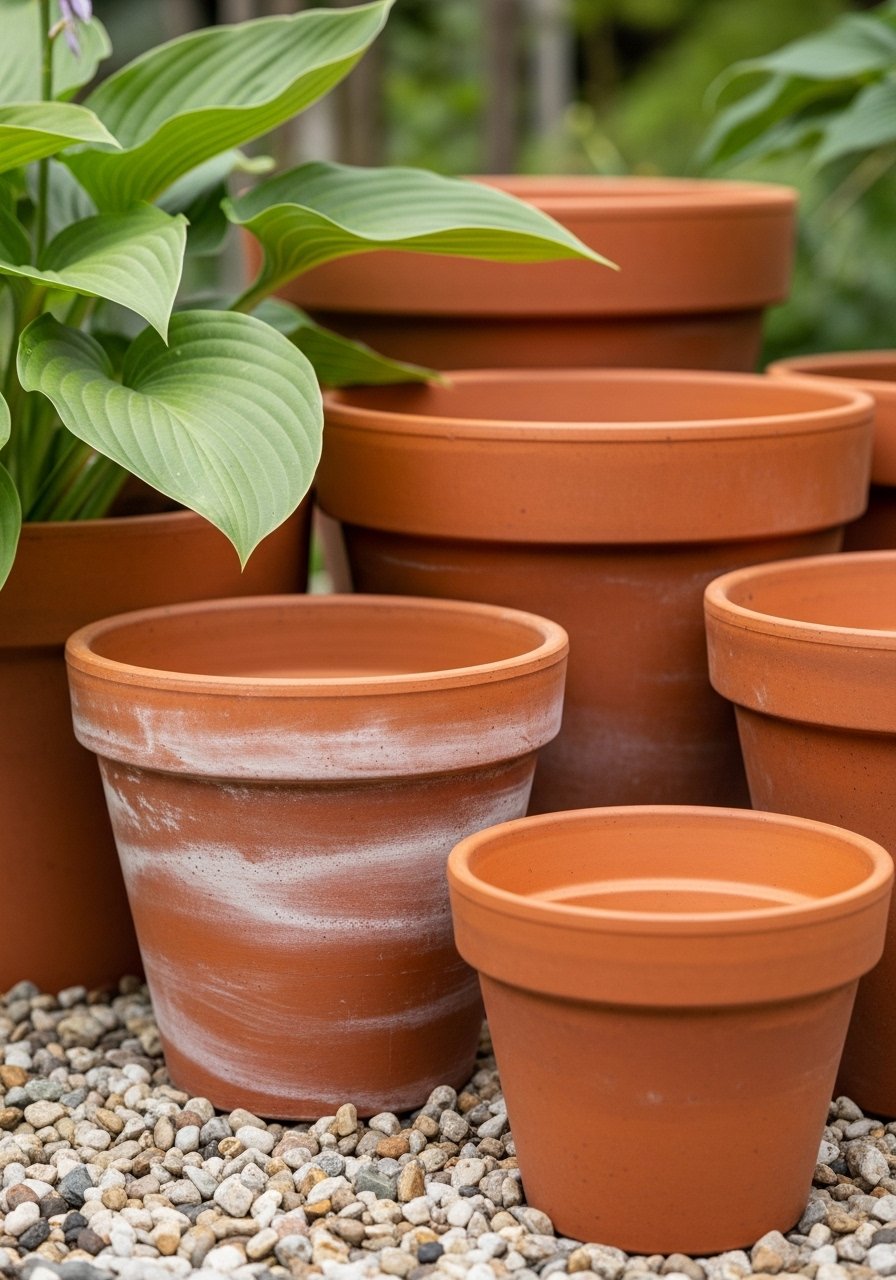
I group three terracotta planters—tall in back, short out front—off-center from the obelisk. Fill with lavender; their scent drifts.
Depth appears. The bed folds in layers, inviting closer look.
Folks overlook odd numbers; even feels stiff. Why: mimics nature. Avoid pots too matchy—they compete.
From the sidewalk, it flows warm.
Step 4: Fill with Low Textures
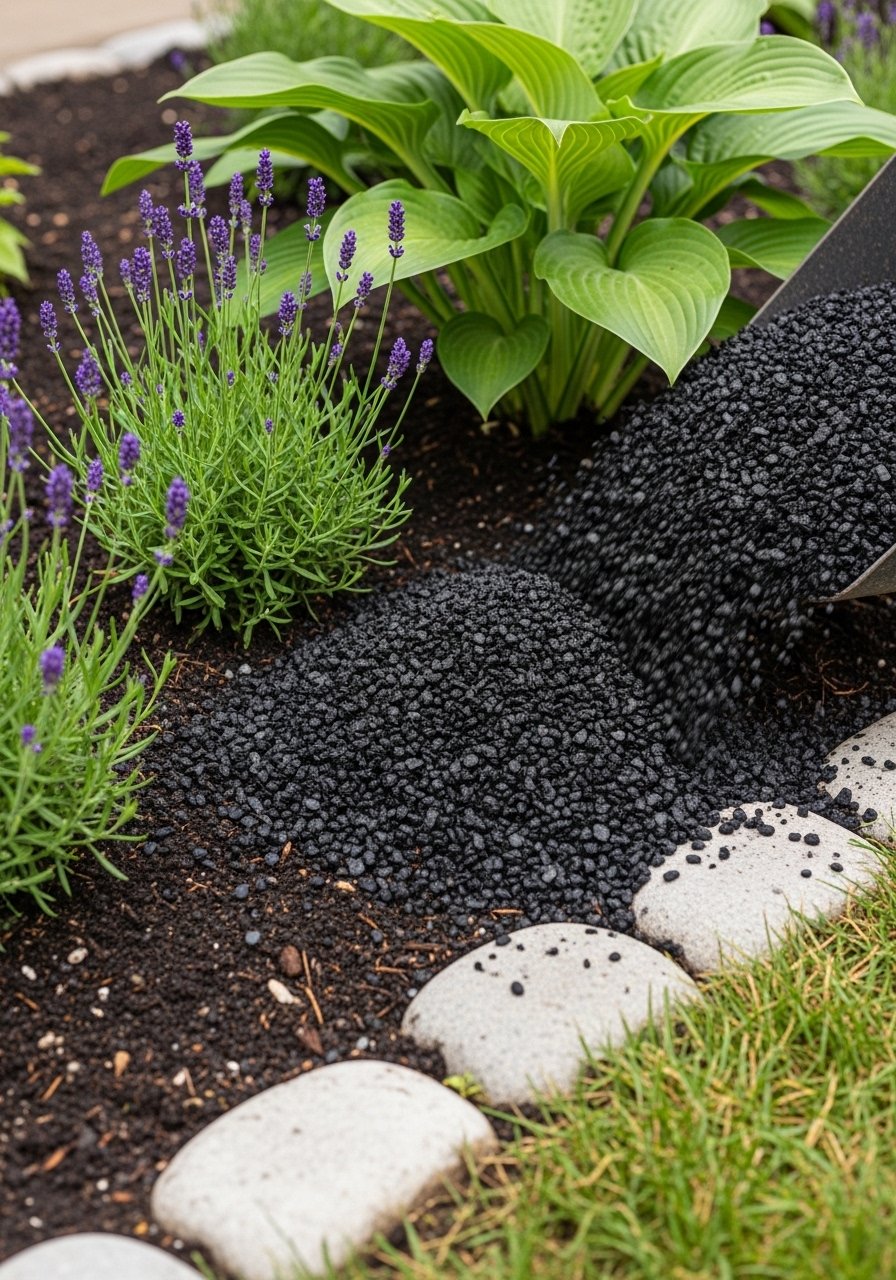
I tuck hostas along edges, then rake black gravel mulch over bare dirt. It softens, ties colors.
The ground quiets—clean but not bare. Textures hold the eye.
Missed insight: mulch repeats shapes underneath. Mistake: skimping—it dries fast. Generous layer lasts.
Stand back. It's comfortable now.
Step 5: Add Path Glow
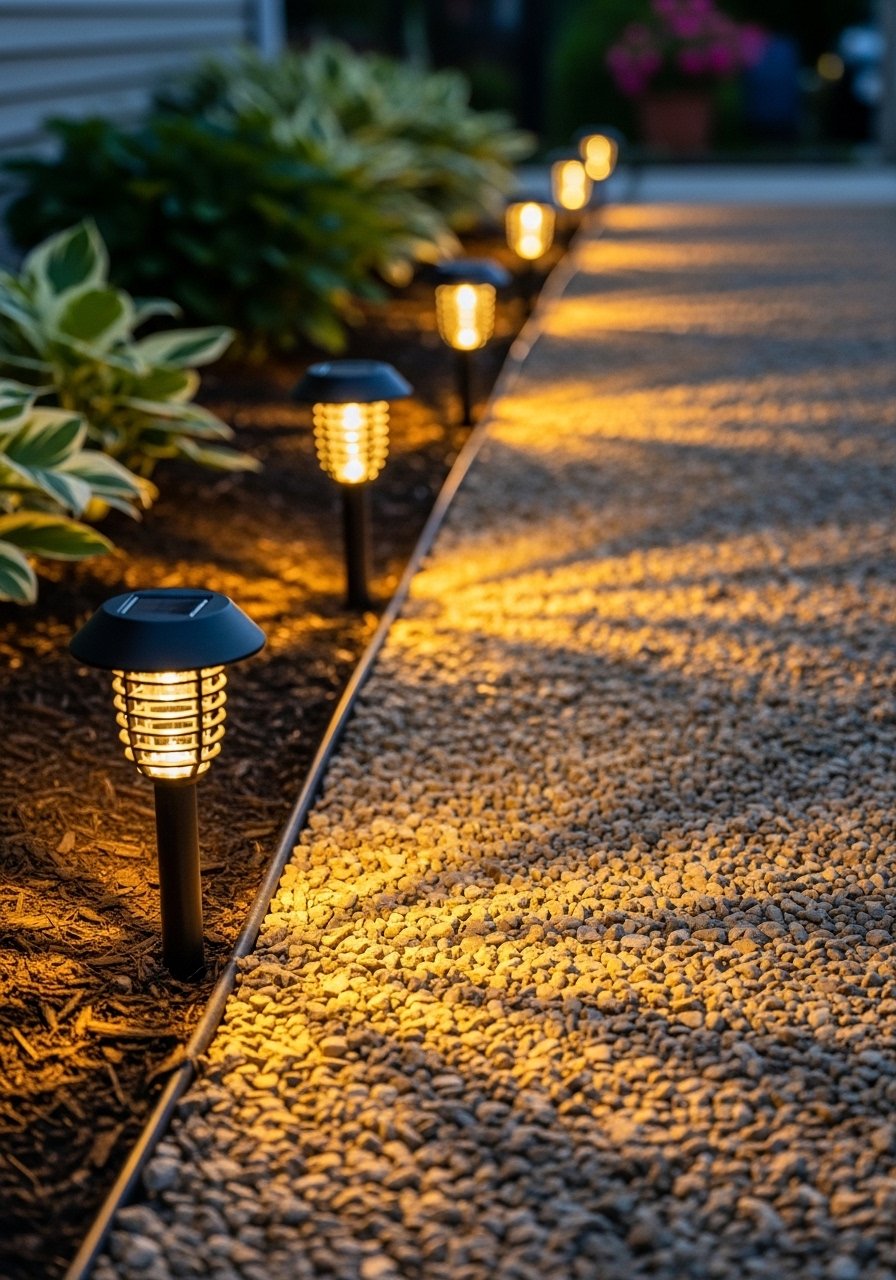
I drop solar lights along the path edge. They charge by day, glow soft at dusk.
Night changes everything—warm welcome without glare.
People forget paths lead the eye. Insight: lights extend the space. Avoid clustering; space them like steps.
It feels done.
Handling Front Yard Sun and Shade
Front yards mix light funny. My side gets morning sun, shade after.
Watch yours a week. Sunny spots take lavender. Shade loves hostas—they fill without fuss.
- Note hot zones: gravel cools feet.
- Shady corners: low pots block weeds.
It stays balanced year-round.
Matching Your House Colors
I glance at my siding—neutral beige. Plants echo: green hostas, purple lavender tips.
Pull one house color into pots or gravel.
- Brick house? Red-toned mulch.
- White? Cool gravel.
- Test small: one pot first.
Keeps it tied, not tacked-on.
Keeping It Fresh Through Seasons
Mine shifts easy. Spring hostas push up. Summer lavender blooms.
Fall: swap one pot for mums.
- Mulch yearly: renews look.
- Trim spent bits: quick pass.
- Winter: lights alone hold it.
Low work, steady feel.
Final Thoughts
Start with edges and one tall piece. That's half the feel.
You'll see it pull together as you go. Mine did.
Now your front yard waits, ready for that quiet welcome. Just stand there after—it's worth it.
Leave a Reply